
In the first part of this series, the explanation of how to configure the FortiAuthenticator with a BYOD guest portal was covered. In the second part, an explanation of how to configure the FortiGate and FortiAP to interact with this portal was covered. In this next installment of the series, the use case around device tracking and avoiding subsequent authentication on the guest portal after the initial successful authentication will be covered.
Ease of Use and Management
If a user can log in with username and password, what is the need for device tracking? Ultimately, it comes down to providing a “better” user experience for the end user and removing obstacles to help them adopt what the administrator of the network has provided. Once a user logs in initially with a username and password, all subsequent accesses to the network will occur without prompting the user for authentication credentials.
However, this particular features comes at a cost. The device tracking is done by recording the MAC Address of the device at the time of authentication. Some will see this as a potential security issue since this can easily be spoofed by a nefarious user. In most cases the risk is mitigated by isolating these users to their own subnet and preventing communication between the devices while on that guest network.
Configure FortiAuthenticator for Device Tracking
Building upon the foundation that was set in the previous article, the FortiAuthenticator configuration can be amended to allow devices that successfully authenticate to the guest portal to register their mac address.
Configure MAC Device Group
In order to facilitate this, a local ground these devices will register to needs to be created. To set this up, follow the steps below:
1. Log into the FortiAuthenticator as an administrative user
2. Navigate to the “Authentication | User Management | User Groups” section ; Click “Create new”
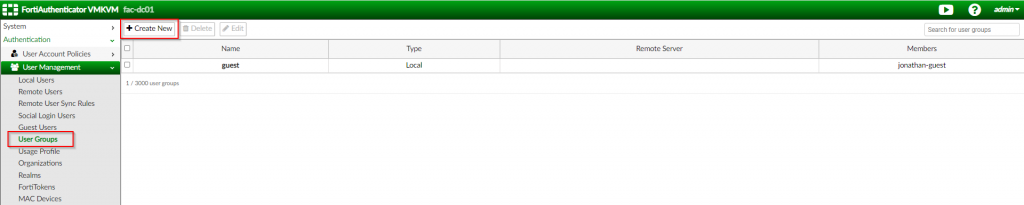
3. Create a new user group called “guest_devices” as the “MAC” type | Click “OK”
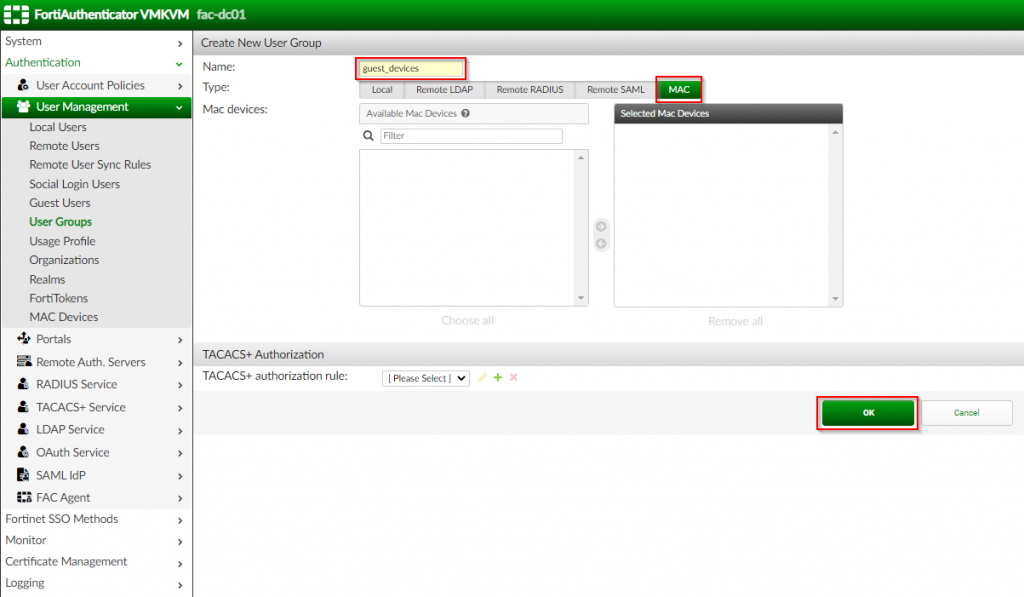
| Option Name | Value |
| Name | guest_devices |
| Type | MAC |
Once the device MAC group has been created, the portal can be augmented to enable device tracking.
Configure Device Tracking in Portal
To configure the MAC device tracking, the existing portal can be updated with the settings enable the feature. To accomplish this, follow the steps below:
1. Click “Authentication | Portals | Portals” ; Edit the previously created portal
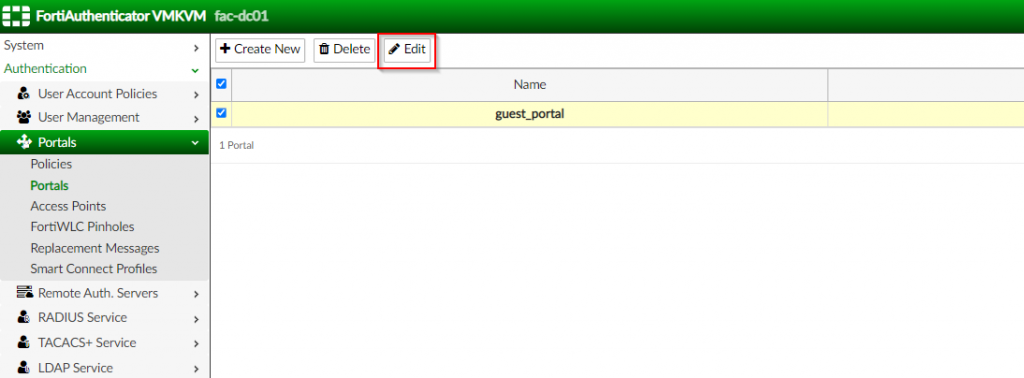
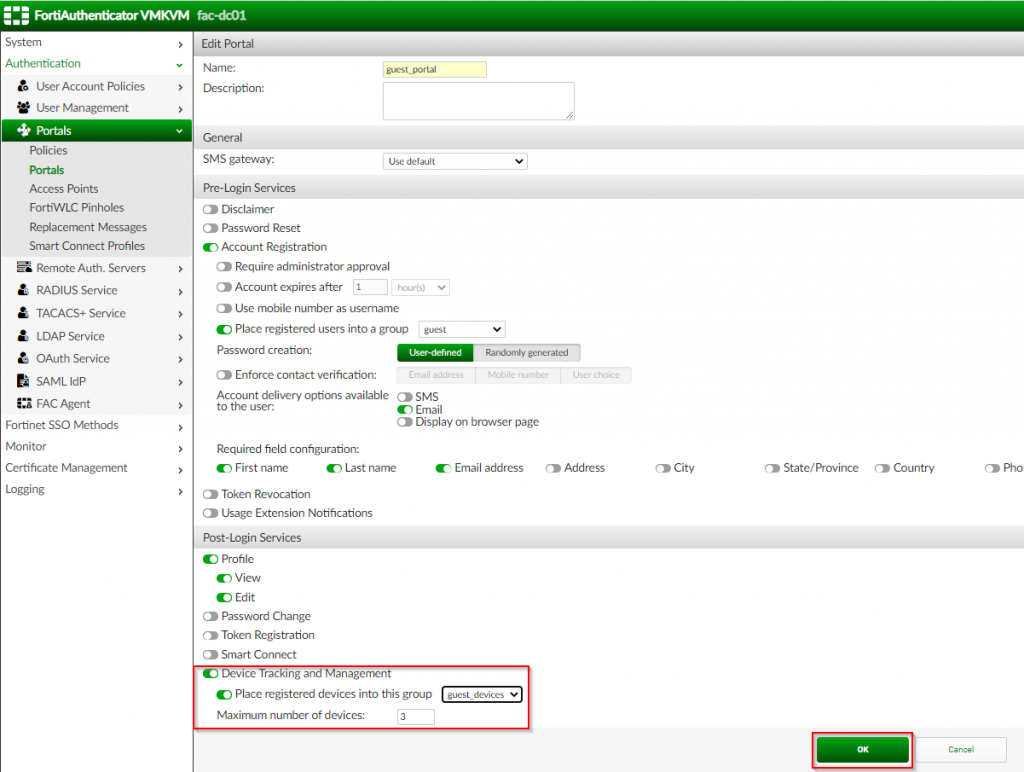
2. In the “Edit Portal” page, enable the “Device Tracking and Management” under the “Post-Login Services” ; Enable “Place registered devices into this group” ; Select the newly created group (i.e. “guest_devices” l Click “OK”
Once the device tracking has been enabled and the corresponding group has been selected, the FortiAuthenticator can be configured for MAC Authentication Bypass (MAB) to allow previously registered devices to login without entering credentials.
Configuring FortiAuthenticator for MAC Authentication Bypass (MAB)
The MAB feature allows the FortiAuthenticator to receive the MAC address of the connecting device and perform an authentication based on the MAC address instead of the username and password. To facilitate this, the FortiAuthenticator needs to have the device that will pass the MAC address via RAIDUS authentication.
Configuring the RADIUS Client for the FortiGate
In order to receive the request to validate the MAC address, the FortiAuthenticator needs to be configured to receive the RADIUS request from the FortiGate. The initial configuration requires a RADIUS Client to be configured to receive the RADIUS request. To configure this, follow the steps below:
1. Navigate to the “Authentication | RADIUS Service | Clients” ; Click “Create New”

2. In the “Create New Authentication Client” page, create the “fortigate_wireless_controller” object; Set the “client address” to the corresponding option and populate it with the identifying information for the request; Set the shared “secret” between the FortiAuthenticator and the FortiGate; Click “OK”

| Option Name | Value |
| Name | fortigate_wireless_controllers |
| Client Address | Subnet |
| IP/Name | <IP address/Subnet of FortiGates> (i.e. 192.168.200.0/23) |
| Secret | <password set on FortiAuthenticator RADIUS Client> |
At the conclusion of this section, the RADIUS client is configured but needs to be tied to a policy in order to allow RADIUS requests to be answered by the FortiAuthenticator.
Configure the Authentication Policy
Once the RADIUS client has been configured, a policy needs to be created in order to reference this client so that these RADIUS requests can be serviced. To accomplish this, follow the steps below
1. Navigate to “Authentication | RADIUS Service | Policies”; Click “Create New”

2. In the “RADIUS clients” section, set the “policy name”; select the previously created “fortigate_wireless_controllers” for the “RADIUS Clients”; Click “Next”
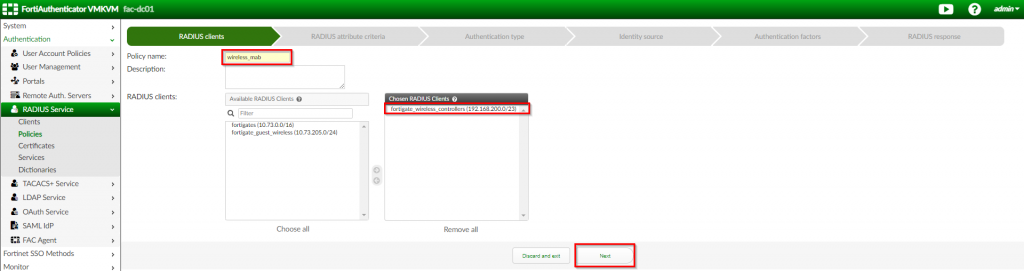
| Option Name | Value |
| Policy Name | wireless_mab |
| RADIUS Clients | fortigate_wireless_controllers |
3. Under the “RADIUS attribute criteria”, allow the defaults to remain; Click “Next”

4. Under the “Authentication type” page; Select “MAC Authentication bypass (MAB); Click “Next”

5. Under the “Identity Source’ page; Choose “guest_devices” for the “Authorized groups”; Click “Next”

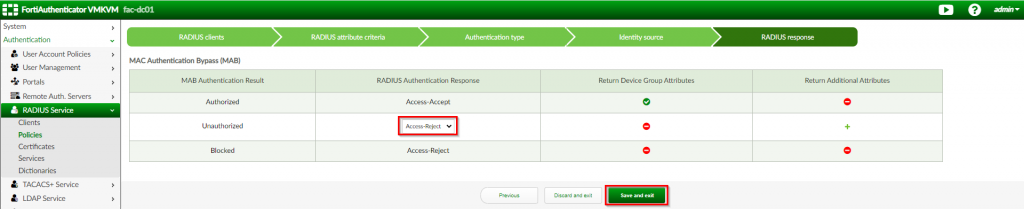
6. Under the “RADIUS response”, change the “Unauthorized” section to “Access-Reject” Click “Save and exit”
Once this has been completed, the FortiAuthenticator is ready to service authentication requests from a wireless controller based on the MAC address of the device connecting to the wireless guest network. The last step is to configure the wireless controller for MAC Authentication Bypass. The next (and final) blog article will cover this in more detail.
As for now, please let me know if you have any feedback in the comments below and as always, I hope this helps.
Great guide! However we keep receiving the message “you are not allowed to access this resource”. I checked all settings several times but cannot figure out why we aren’t redirecting to the registration page. Can this be because of certification misconfiguration?
My apologies in the delayed response. When you get that error message, where is it coming from, the user’s browser? Also, where do you have the external captive portal configured? Are you doing this with FortiAP/FortiGates or using some other wireless solution? Typically certificate errors are going to result in a message from your browser, but if the message is coming from the FortiAuthenticator, it could be something else. If I had to venture a guess, I’m going to say it is probably related to authentication policy where you define the IP address of your wireless controller for the request.… Read more »