
Introduction
I could think of no better way to kick off 2022 than talking about one of the hottest buzzwords in Cyber Security today. Zero Trust Network Access (ZTNA) is a very hot topic in light of some major vulnerabilities and exploits that have happened in 2021. One of the most notable to end the year was the highly exploitable Log4J Vulnerability that affected many publicly facing servers (and services) on the Internet. This vulnerability almost seemed to come out of left field and caught many different organizations off guard because this was with one of the most well known (and trusted) software providers (Apache Foundation).
The Problem
While there are indeed some services that need to be accessible to anyone, anywhere, from any machine at any time, there are many services (critical to an organization) that do not. A quick look on public Internet scanners show a large amount of terminal servers, Intranet sites and other equipment that should only be accessible from internal (dare I say “trusted”) resources. However, this concept of “trust” is continuing to be skewed because many malicious users are leveraging these inherently trusted devices to access these hosts to perform data extraction, service disruption and other nefarious behaviors.
Current Solutions
Security professionals may consider these scenarios to be attributed to a gross misconfiguration and/or poor environment design. They may even attempt to protect these vulnerable environments by recommending a remote access virtual private network (VPN) or even use a remote proxy to provide authenticated access to these services. While those options do provide added protection (and subsequently, more layers for a hacker to try to penetrate), they are still susceptible to misuse based on the inherent “trust” given to a machine that has successfully authenticated via one of those solutions.
Example
For example, let’s say an IT administrator accesses a jump box (terminal server) that provides connectivity to all of the servers for an organization. With a standard VPN client, the administrator would be required to authenticate their machine (typically prompted by the VPN client). Once successfully authenticated, that administrator typically has predefined access across all hosts no matter the current state of the machine.
In most cases this is fine, but what happens in the scenario where the administrator has an out of date Internet browser which is susceptible to compromise via drive-by exploit that was sent to them via email while connected to the VPN? If the administrator accidently clicks that link which compromises their browser, the botnet command and control will have added a new node to their hive which can be used for further exploitation into an organization.
ZTNA Solution
It would be more ideal if there was some way to continuously profile the machine that the administrator is using to connect to the jump box and ensure it is in its most secure configuration possible. If there was some agent was able to identify that the web browser was out of date with a critical vulnerability, it could restrict access to the important jump box until the machine had no known vulnerabilities. Also, it would be ideal if this was completely transparent to the end user, where their access is granted without any “action” on their behalf.
Fortunately, such a solution exists today with the Fortinet. This is facilitated through the following functions within the Fortinet portfolio:
Continuous Endpoint Profiling
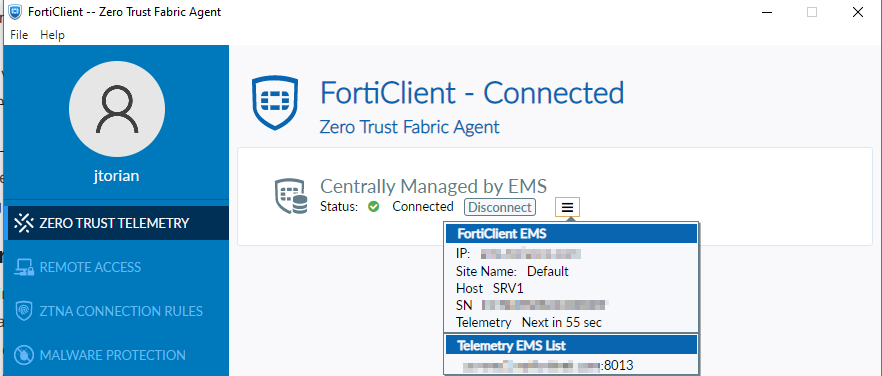
The FortiClient registers itself into the FortiClientEMS. This connection does not require any action from the user and automatically sends the telemetry necessary for profiling to occur.
Working in conjunction with the FortiClientEMS, the FortiGate learns about specific endpoints that are assigned a “tag” that indicates their current posture. Within the FortiClientEMS, many different criteria can be specified to assign this tag to an endpoint. Below is a screenshot from EMS showing how this can be configured and assigned:

Once this rule has been configured and a FortiClient that matches this criteria has been registered into the FortiClientEMS, the tag is assigned.
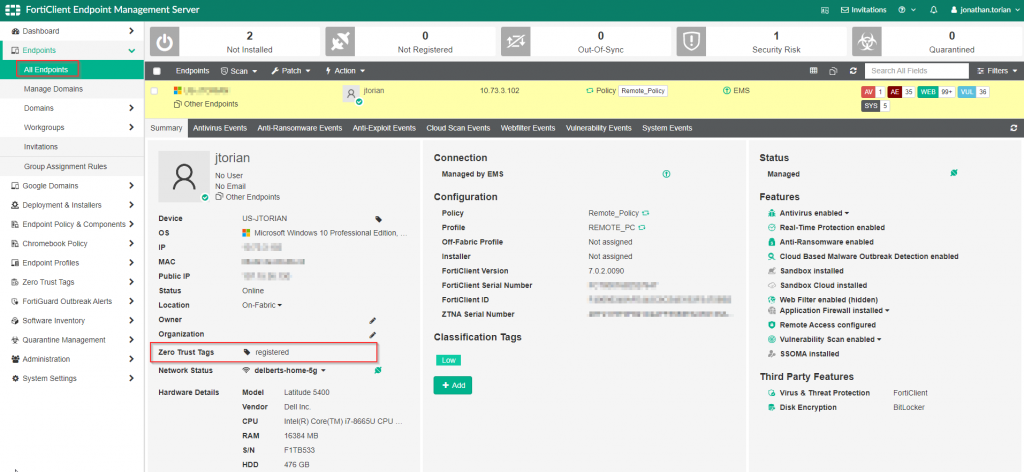
This information and subsequently shared with the FortiGate to provide awareness of the current posture of the endpoint attempting to connect through the firewall.
HTTPS Reverse Proxy
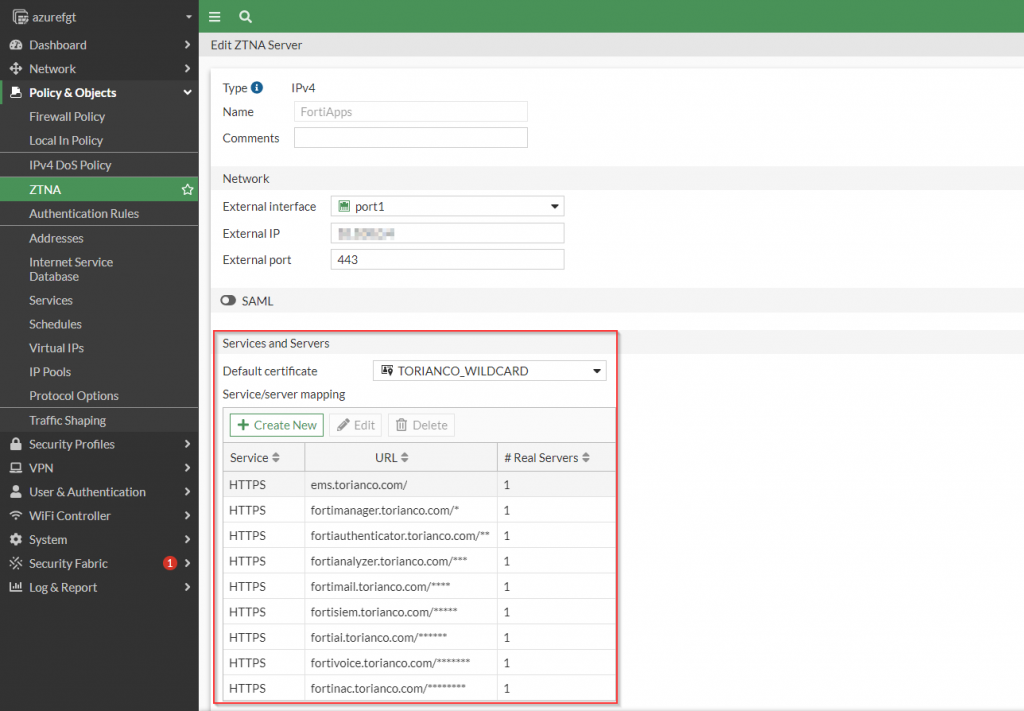
The reverse proxy functionality allows the FortiGate to serve as an enforcement point for the HTTP/HTTPS services that are accessible through it. Instead of the traffic going directly to the backend server, the FortiGate accepts the traffic on the servers’ behalf and then forwards it after inspecting the traffic.
Since the FortiGate is serving as a reverse proxy, it offers SSL Offload capabilities for the backend web server which can potentially alleviate some load from that server. The FortiGate can also provide complete visibility in the traffic directed to it to identify exploits against that server. This allows for deep packet inspection for traffic destined to those back end servers.
TCP Forward Proxy
Accessing services by their local IP address (similar to what is done with VPN) is facilitated through the use of the TCP forward proxy functionality of the FortiGate. A common service this is useful for is accessing a jumpbox via RDP which should not be publicly accessible from the Internet. The FortiClient working in conjunction with a FortiGate can intercept the traffic destined to that private IP address and tunnel it via HTTPS to the FortiGate which then, after being inspected, is forwarded on to its final destination.
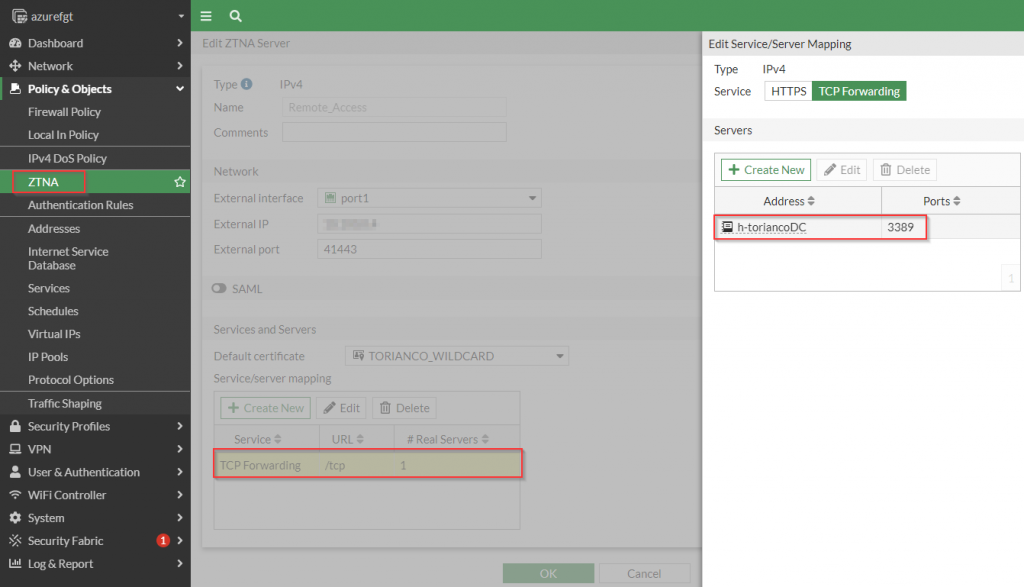
Once the FortiGate has been configured to serve as a TCP Forwarding proxy, the FortiClient is configured with ZTNA Connection rules to allow to identify which traffic it needs to tunnel to the FortiGate.
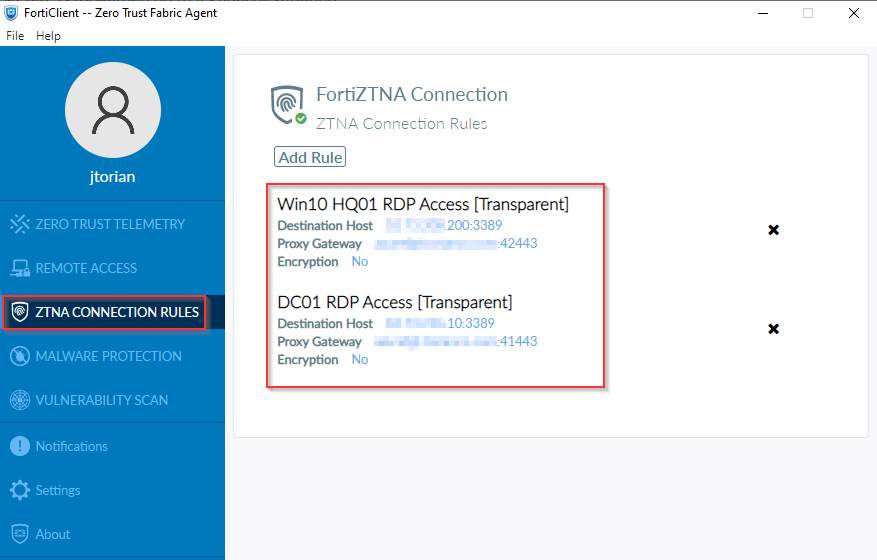
Figure 6. – Screenshot of the FortiClient with ZTNA Connection Rules.
My Use Case
One of the best ways to understand a solution is to find an applicable real-world use case for it. Recently, I was promoted at my job and due to that, I am forced to rebuild my lab to accommodate my new responsibilities. While I have typically use traditional remote access methods to give myself access to my lab when I am not at home, I found that this scenario would be a great opportunity to really understand Fortinet’s implementation of ZTNA. I am pleased to say that this journey has been great to solidify many of the concepts for ZTNA as implemented with Fortinet.
Here is a glimpse of the environment via this Visio diagram:
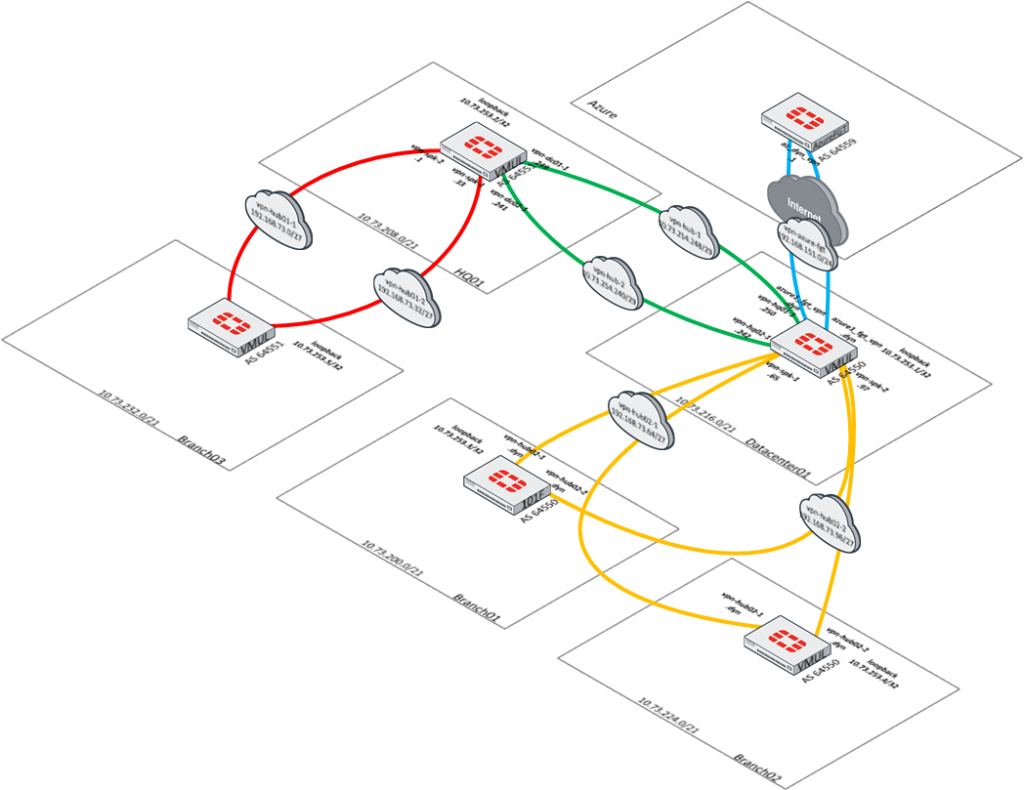
What stands out from this design is that the only component that is accessible to the public Internet is the Azure FortiGate. This Azure FortiGate builds an encrypted tunnel to my FortiGate in my homelab. Any access to components within the homelab are sent via that encrypted tunnel to ensure that all proper checks are performed prior to granting access. This also gives me the opportunity to perform proper deep packet inspection to any of these hosts that are in my lab environment.
In subsequent blogs, I will walk through more detail around my use case and implementation of the Fortinet solution to provide secure access to my lab environment from anywhere with my trusted devices. Stay tuned and as always, I hope this helps!