
When FortiAuthenticator is mentioned, what is the first thing that comes to mind? Most likely two-factor authentication, but maybe there is awareness around its ability to serve as a certificate authority. It could also be known for its capabilities as a RADIUS server or a single-sign on portal. As in Fortinet tradition, the FortiAuthenticator is a “swiss army knife” when it comes to identity management and it has many functions. One component of functionality that may not be as well known is its ability to serve as a Bring Your Own Device (BYOD) portal.
Importance of Bring Your Own Device
The origin of BYOD stems from the massive increase of users and/or customers bringing their personal devices on to a business network. Since it is imperative for users to stay connected all the time, their personal phone, tablet, smart watch, etc. connect to whatever WiFi that is available to ensure connectivity. While the advent of 5G cellular networks will lesson this burden, it will not completely eliminate it.
Given that there are these demands from users, a prudent administrator of the business networks must find a way to accommodate these requests while maintaining a separate secure environment for those devices. In addition to that, the administrator cannot be burdened with the administrative overhead of registering and tracking those devices as they will likely be more transient than company owned assets. The FortiAuthenticator can actually alleviate a lot of these responsibilities from the administrator.
Topology Example
Here is a common topology to illustrate this type of deployment:
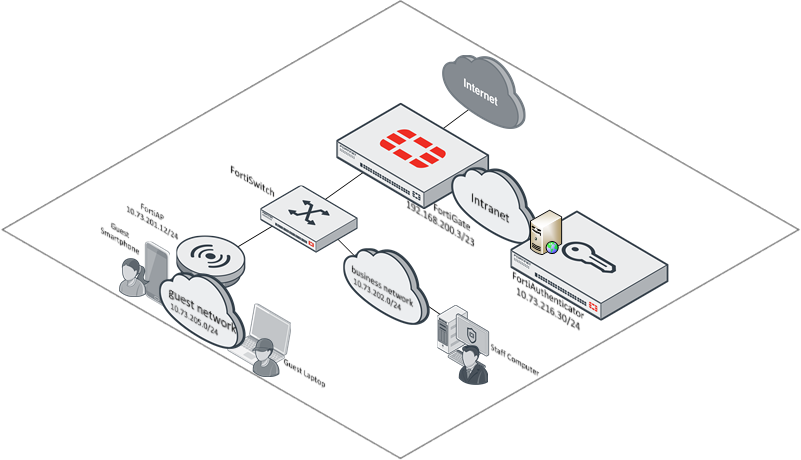
In this topology, there is the business network where the staff conducts their functions to support the business. However there is also a guest network in which guests of the company and even staff can connect their personal devices to get Internet access. Generally speaking, these networks need to be on separate networks so that they can be isolated from each other.
While an administrator may take comfort knowing that non-company owned assets are on a separate network, they may still want to be able to know some identifying information about the devices connecting into this guest network. Adding the FortiAuthenticator simplifies this requirement for an administrator.
Defining the Guest Portal Workflow
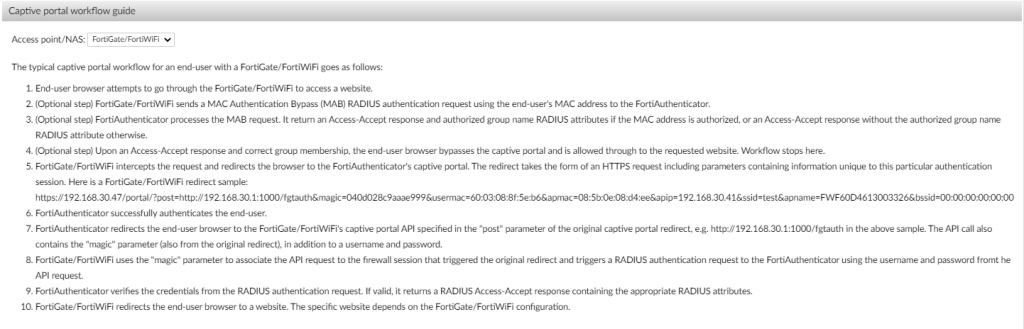
The FortiAuthenticator performs a certain workflow in order to authenticate users via the guest portal. This is annotated within the wizard of the policy creation within the FortiAuthenticator. For completeness sake, it is included below:
Configuring the FortiAuthenticator
As stated at the beginning of this blog, the FortiAuthenticator can take on many roles. This section will provide guidance on how to configure the BYOD portal functionality on the platform.
Configure the Guest Group
The first step is configuring the groups for the guest users. As part of the BYOD workflow, the FortiAuthenticator will assign these users to this group and apply an authentication policy based on this identifier.
To configure the groups, complete the following steps:
1. Log into the administrator interface of the FortiAuthenticator
2. Click on “Authentication | User Management | User Groups” ; Click “Create New”
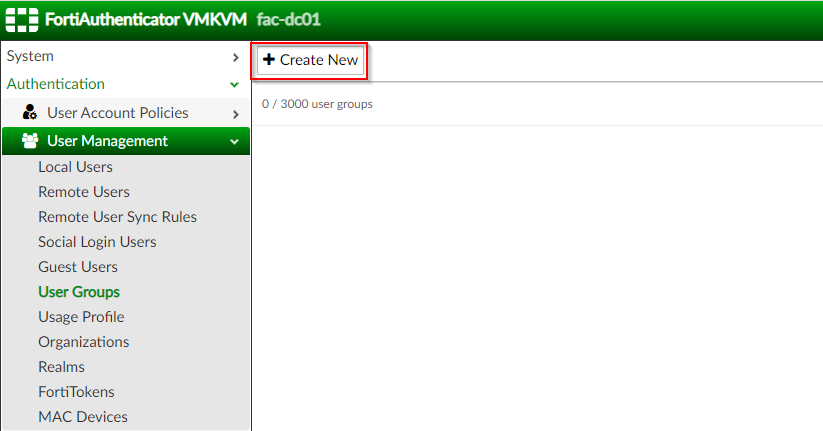
3. Under the “Create New User Group” section | Populate “Name” (guest) | Type: Local | Click “OK”
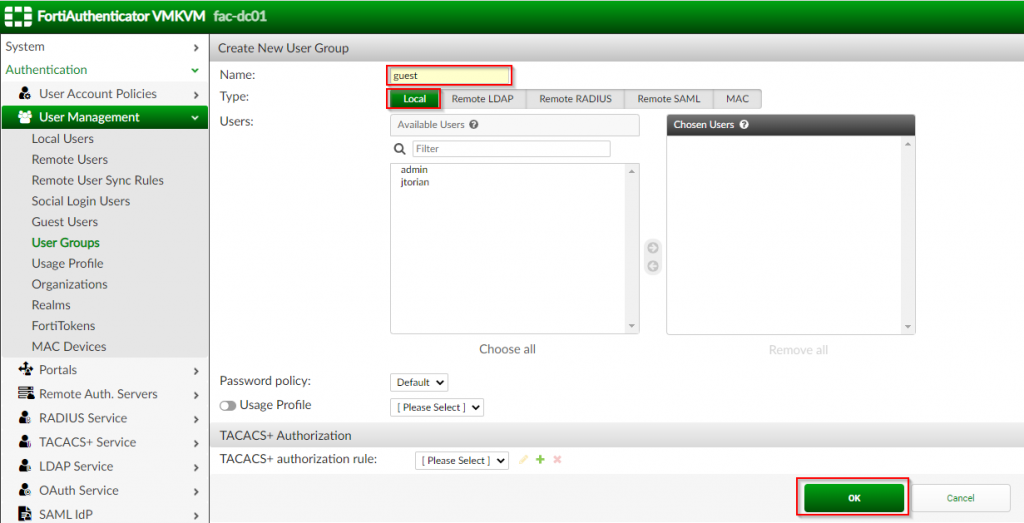
Once this group has been created, it can now be referenced as part of the portal creation.
Configure the Portal
The second step is configuring the portal. This tells the FortiAuthenticator what data you want to capture from the user as well as the pre/post logon services to provide to the user when interacting with the portal.
To configure the portal, complete the following steps:
1. Click on “Authentication | Portals | Portals” ; Click “Create New”
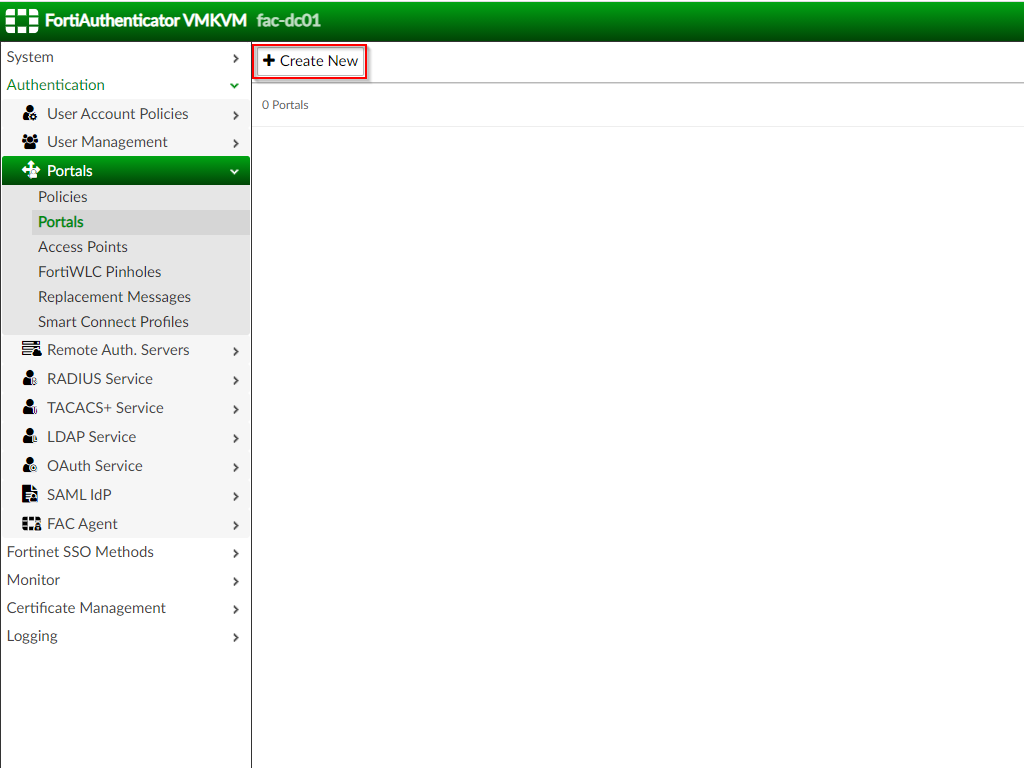
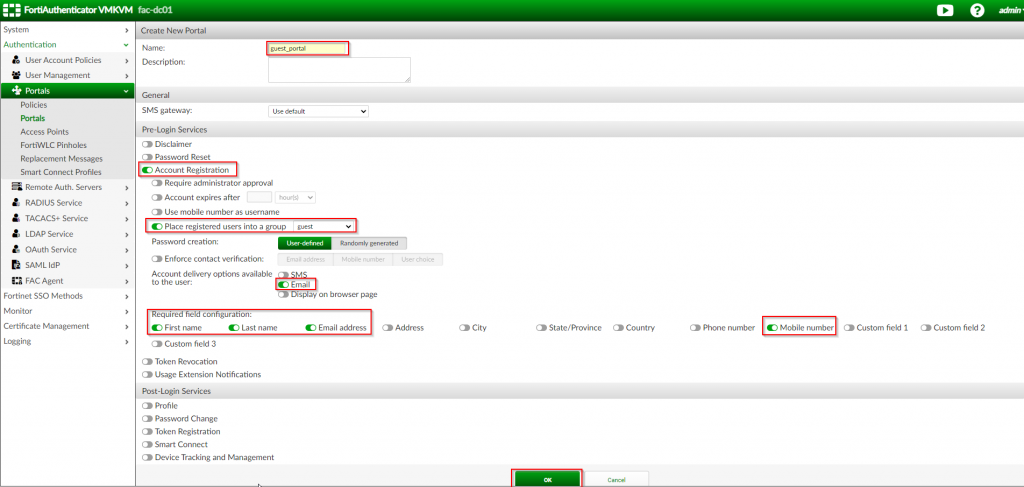
2. Under the “Create New Portal” page | Fill out the applicable options as shown in screenshot below:
| Option Name | Value |
| Name | guest_portal |
| Account Registration | <Enable> |
| Place Required users into a group | <Enable> | Choose “guest” |
| Account Delivery Options | <Enable> Email |
| Required Field Configuration: | Choose “First Name”;”Last Name”;”Email Address”;”Mobile Number” |
3. Click “OK”
Once the portal has been created, the supporting objects to help define the policy needs to be created.
Create the Access Point Object
Providing a guest portal is commonly used for wireless BYOD. Due to this, part of the guest portal policy requires that you define the IP address of the access points that the guest user will connect to. To define this object within the FortiAuthenticator, complete the following steps:
1. Click “Authentication | Portals | Access Points” ; Click “Create New”
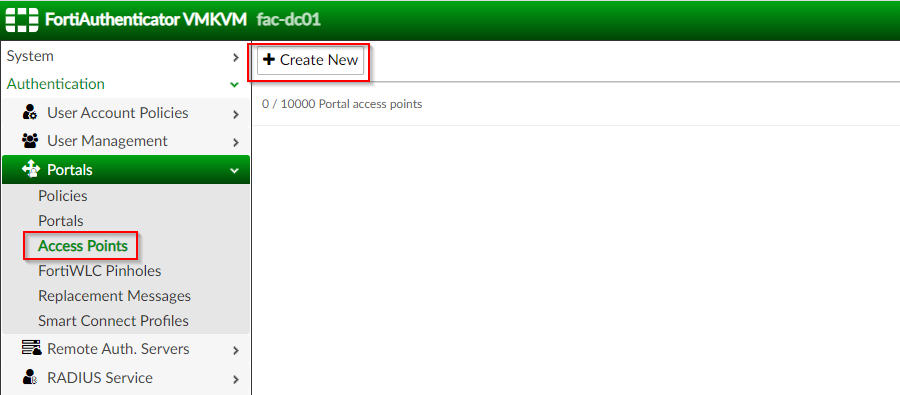
2. Under the “Create New Access Portal” page | Fill out applicable options as shown in screenshot below:
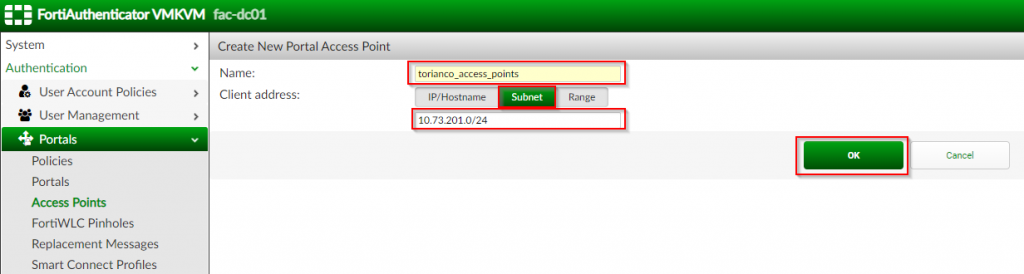
| Option Name | Value |
| Name | <name of your access points> (i.e. torianco_access_points) |
| Client Address | Subnet ; <CIDR notation for access point network> (i.e. 10.73.201.0/24) |
3. Click “OK”
Special Note: When the FortiGate serves as the wireless controller and is providing a tunneled SSID, it will send its NAS identifier to the FortiAuthenticator with its IP address of the local network it is tunneling on behalf of. In this case, this correlates to the guest network (i.e. 10.73.205.0/24).
Once the access point has been created, the next step is to define the object for the RADIUS client that will be submitting requests to the FortiAuthenticator.
Create the RADIUS Client
In most cases, the wireless controller will be interacting with the FortiAuthenticator via the RADIUS protocol. In the case where the FortiGate is managing the FortiAPs, it serves as the wireless controller and will be responsible for this task. To define this object within the FortiAuthenticator, complete the following steps:
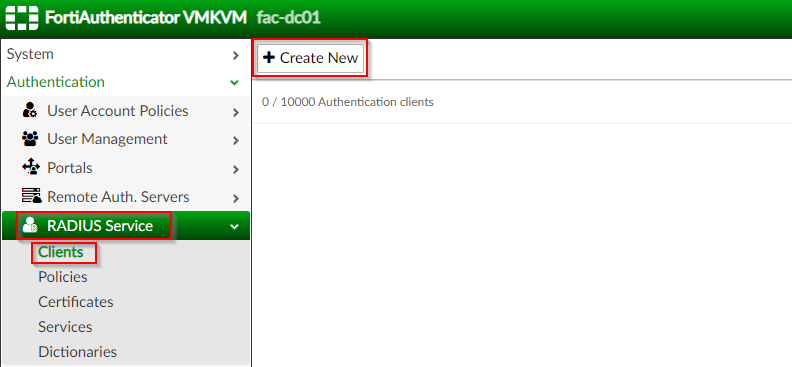
1. Click “Authentication | RADIUS Service | Clients” ; Click “Create New”
2. Under the “Create New Authentication Client” page | Fill out application options as shown in the screenshots below:
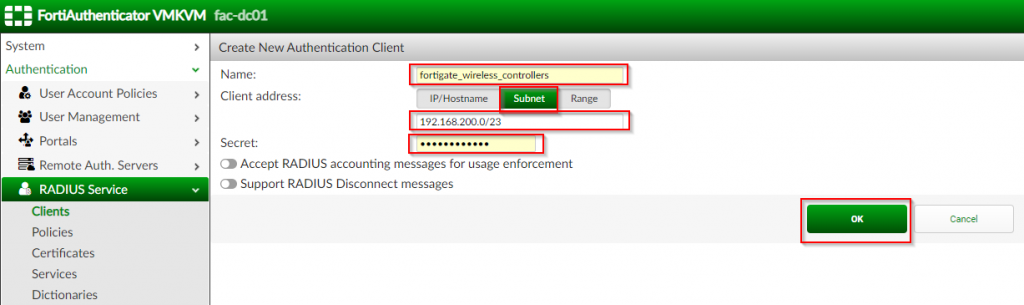
| Option Name | Value |
| Name | <name of wireless controller(s)> (i.e. fortigate_wireless_controllers) |
| Client Address | Subnet ; <subnet of wireless controllers> (i.e. 192.168.200.0/23) |
| Secret | <password between wireless controller and FortiAuthenticator> |
3. Click “OK”
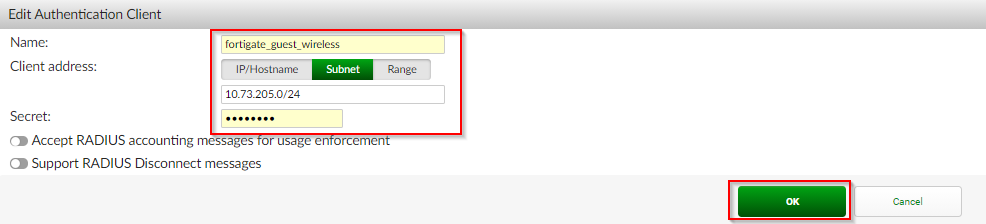
Special Note: When the FortiGate serves as the wireless controller and is providing a tunneled SSID, the FortiAuthenticator will authenticate the local guest portal via RADIUS and send a NAS identifier to itself containing the IP address of the FortiGate for the guest network. In this case, this correlates to the guest network IP (i.e. 10.73.205.1/24). Due to this, an additional Authentication client containing the subnet was created and applied within the portal policy.
Now that the supporting objects needed are created, the portal policy can be created.
Create Portal Policy
The portal policy instructs the FortiAuthenticator on which portal to offer a given host based on the criteria defined. It also defines the authentication method used for said host when they request access via the FortiAuthenticator. To configure the portal policy, complete the following steps:
1. Click on “Authentication | Portal | Policies” ; Click “Captive Portal” ; Click “Create New”

2. Under the “Policy Type” section ; Fill in “Name”, “Description”, “Portal” ; Click “Next”

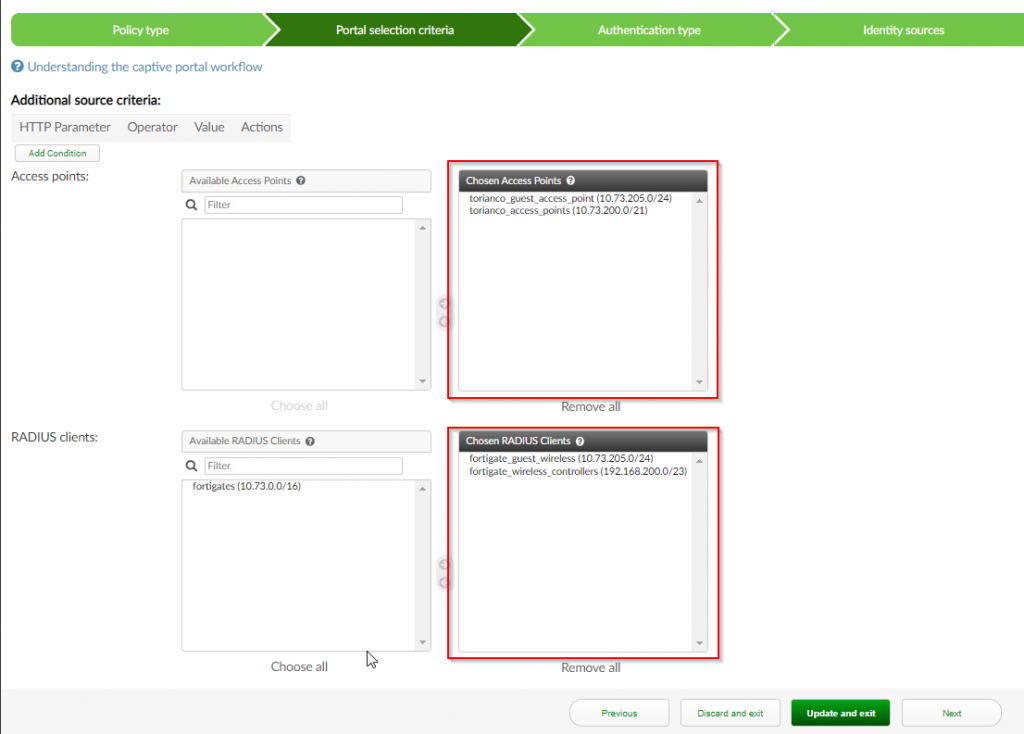
3. Under the “Portal Selection Criteria” section ; Select (Double-click) the previously created “Access Point” ; Select (Double-click) the previously created “RADIUS Client” ; Click “Next”
4. Under the “Authentication Type” section ; Select “Password/OTP authentication” ; Select “Local/remote user” ; Click “Next”

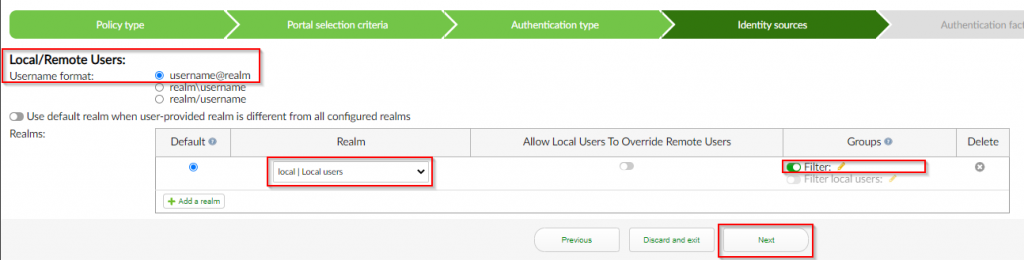
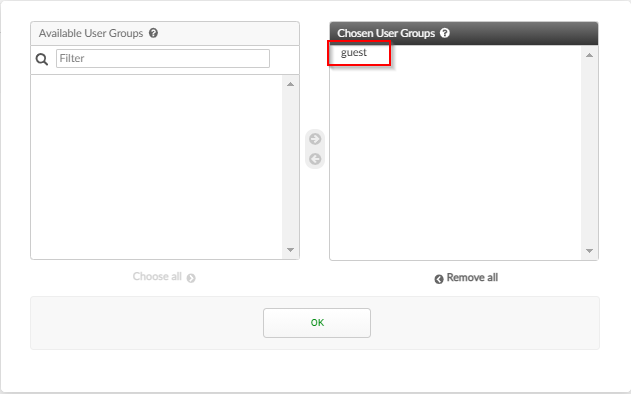
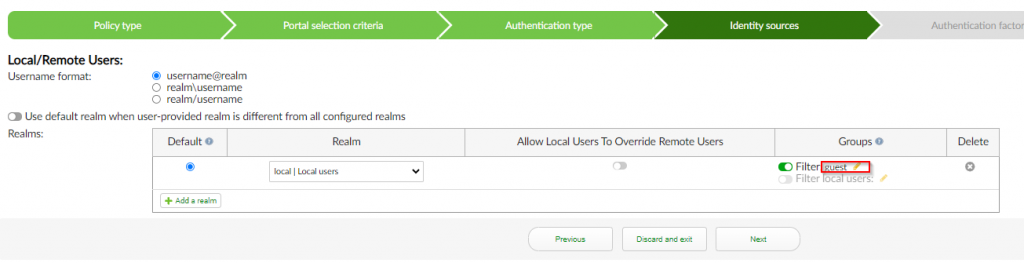
5. Under the “Identity sources” section ; Select “username@realm” for the “Username Format” ; Select “local | Local users” for “Realm” ; Select <enable> for groups ; Select “guest” ; Click “Next”
6. Under the “Authentication Factors” section ; Select “Verify all configured authentication factors” ; Select the variable value for the mac address sent by your wireless controller in the “MAC address parameter” (FortiGate sends the variable “usermac”) ; Click “Next”

7. Under the “RADIUS response” section ; Click “Save and exit”

At this point the FortiAuthenticator is ready to start serving a Guest Portal Page where users can sign up for an account and immediately get access to the guest network on a properly configured access point/wireless controller. In my next article, I will cover how to set up the FortiGate for interaction with the FortiAuthenticator.
As always, if you have any questions or have any feedback, please leave a comment below. Thanks for reading!
How to do the same but for a wired network? with Fortigate, Fortiswitch, and FAC?