
As with the other related Zero Touch Provisioning blogs, the baseline article around configuring the FortiManager should be reviewed in order to fully understand the background of the process to provision the FortiGate configuration from FortiManager.
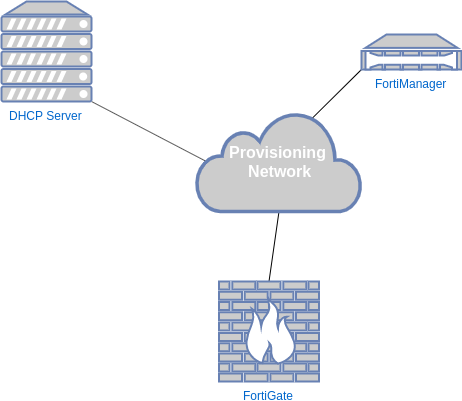
All of the Zero Touch Provisioning methods up to this point required some type of Internet connectivity or required some level of manual intervention from the administrator to register to the FortiManager. However, in the situation where the FortiGate is being deployed in a closed environment (such as a restricted network or a lab), there is a method that can be used in order to configure the FortiGate to connect to the FortiManager. That method is by using DHCP options as part of the offer that comes from the DHCP server.
DHCP Options
The administrator can define a DHCP option to instruct the FortiGate to initiate a connection to the FortiManager based on the value of those options. The option number and value correspond to the following:
| DHCP Option | Value |
| 240 | FortiManager IP Address |
| 241 | FortiManager FQDN |
Upon receiving this option as part of the DHCP offer from the DHCP server, the FortiGate will populate the IP or FQDN of the FortiManager similar to what is shown above in the CLI section. A key point of clarification is that only one of these options need to be specified in the DHCP server that will be providing leases to the client FortiGates.
In the next section, I will walk through my lab environment to demonstrate how these components are configured.
Procedure
The procedure to get this functionality working is broken down into three parts:
- Configure the DHCP Server
- Configure the FortiManager
- Bring the FortiGate online and observe the process
DHCP Server Configuration
In this example, I am going to use a FortiGate for the DHCP server as it has all of the options necessary for this functionality. However, any standard compliant DHCP server that supports DHCP options will likely satisfy this requirement. The picture below should be adaptable to allow a different DHCP server to be substituted.

As referenced in the picture above, the “Additional DHCP Options” has the option code “240” specified with a corresponding IP address that reflects the IP address assigned to the local (reachable) FortiManager.
The option code “241” code have been specified as well, however it would require that the FortiGate was allocated to a DNS server that would be able to resolve that FQDN when the FortiGate makes that request.
FortiManager Configuration
This procedure is very similar to the “serial number” method detailed in the following article. The below section will assume that you are familiar with that section and will pick up with the steps that are additional to that procedure.
Configuring the Model Device
After following the procedure in the referenced article to add a model device, there are a few more steps needed to prep the device to receive the configuration pushed from the FortiManager automatically. Those steps are:
- Apply the configuration to the FortiGate model device
- Update the “username” and “password” for the model device so the FortiManager authenticates with authorized credentials upon connection
Applying Configuration
In this section, I will be applying the configuration via FortiManager scripting.
1.Navigate to “Device Manager | Scripts”

2.Right-click the script to apply | Select “Run Script”

3.Select the model device | Click “Run Now”

4.Confirm that the script runs successfully | Click “Close”

Configuring FortiManager with Correct Authentication Credentials
The FortiManager needs to authenticate to the FortiGate with the correct authentication credentials upon FortiGate connection for this process. Since the FortiGate is in a factory default status, you will need to use the default credentials of the following:
| Username | admin |
| Password | <blank> |
1.Navigate to “Device Manager | Device & Groups”

2.Right-click the model device (i.e. My60E) | Select “Edit”

3. In the “Admin User” field, type “admin” | In the “Password Field”, remove the existing entry | Click “OK”

At this point, the FortiManager is ready to receive a registration request from the FortiGate.
Zero Touch Provisioning Process
Once you have the DHCP server configured and the FortiManager configured, the next step is to factory reset the FortiGate on that network and let the process occur.

You should see that once the FortiGate comes online and receives the correct information from the DHCP server, it should automatically register into the FortiManager. At this point, you should see the FortiManager kick its automated process to begin pushing down the configuration to the FortiGate:
1. The FortiManager automatically adds the FortiGate based on the existing model device

2. The FortiManager begins the process of pushing the configuration previously assigned to the model device to the FortiGate


3. Upon successful completion of the process, the FortiGate will show up as “synchronized” in the FortiManager

Debugging
FortiManager
In my experience, the testing of this feature is not 100% successful with automating the deployment of the configuration to the FortiGate. To get more information as to why the process failed, there are certain locations within the FortiManager you can look to get more information:
Task Monitor
The task monitor is a great place to get high level details of every job that runs in the FortiManager. Below is a picture containing the details of a successful job as well as an entry that failed.

Event Log
The event log is useful for gathering more details into every action that the FortiManager records. While it may not give you the exact cause for a behavior, it can provide more insight into the outcomes.


FortiGate
The best way to check to see if the FortiGate has received a configuration from the FortiManager is to check its configuration. However, in order to determine if the FortiGate received the correct information from the DHCP option, you can use the following command:
diag fdsm fmg-auto-discovery-status
As you can see from the output of this command, the FortiGate learned the corresponding IP address from the FortiManager via the DHCP option.
Security Considerations
The above post details procedure that can be used to automatically provision a FortiGate by pointing it to a FortiManager. However, a security conscious engineer may consider that this could be leveraged by a malicious actor by using a rouge DHCP server where a FortiGate is known to exist. That engineer can rest easily knowing that there are safeguards built into this routine that only allow it to be applied to a FortiGate that is in a factory default state. Once the FortiGate is no longer in a factory default state, this functionality is disabled as indicated by the “config-touched” parameter in the output above.