Disclaimer: This is an affiliate link post. As an Amazon Associate I earn from qualifying purchases.
There is nothing more terrifying to a network/security engineer than getting a notification that your router/firewall is no longer accessible from the network. We immediately go scramble to the datacenter, data closet or whatever that network device lives and immediately start looking for the cause of the problem. Is it the upstream provider router? Is it the firewall rule change? Who knows?
Our only option at that point in time to try to diagnose the problem is by connecting to the console (serial) port of that device and access it by its command line interface (CLI). We rummage through our bag to try to find our USB to Serial cable, connect it to the laptop and launch our terminal program so we can guess the correct baud settings to establish connectivity. After making the correct guess on baud settings, we get access to the device’s CLI but we have to stand with the laptop in one hand while we painstakingly type with the other hand, commands to diagnose the problem.
If only there was some helpful tool to remotely access the network device within a comfortable vicinity so I can focus more on getting the device online…
While the above scenario intended to be a bit of an exaggeration, it is loosely adapted from my real life experience helping customers with the installation and troubleshooting of network devices. During such stressful times, it has been helpful to be able to access the network device in short order without having a fish for console cables and my laptop. Fortunately, this problem is solved via the use of a wireless console server.
Wireless Console Server

A wireless console server (WCS) is a device that allows us to access the serial interface of a device over a network connection. Instead of having to connect the laptop directly to the serial port of the device, we connect to the WCS and access it remotely through Wi-Fi. This opens up the possibilities to:
1. Connect to the WCS from a more comfortable location nearby (like a table where you can rest your laptop)
2. Connect directly from your smart phone (removing the need for a laptop altogether)
One of the most popular solutions available today is a product called Air Console which is a ready made solution for this purpose. While this is a good solution, it comes with a price tag of $80 (at the time of this post) for the standard model and $130 for the pro model.
In this article, I am going to show how I was able to build a wireless console server with Raspberry Pi Zero W for about $50. I was able to save a few dollars and get some cool geek points in the process.
Component List
This is a great project for a network engineer who wants to do a project with a raspberry Pi that does not want to use solder or a breadboard. It is mostly driven by hardware that is already present on the Raspberry Pi but does require a few external components.
The official list price for a raspberry Pi Zero W is $10 from the manufacturer. I have seen it go as low as $5 from MicroCenter (limit 1). However, I do all of my shopping from Amazon (unfortunately no MicroCenter nearby) and I have composed a list of those items in case you want to purchase them too.
Required
Raspberry Pi Zero W Kit – $27
This hardware in conjunction with the micro SD-card provides the platform for the wireless console server.
Micro SD-Card – $6
This unit is the where the raspbian linux operating system is stored.
External Battery – $6 – Supports pass-through charging so you can charge while powering your Raspberry Pi
This hardware serves as the power supply to the Raspberry Pi so that it is not necessary to plug the unit into an outlet.
USB-to-Serial Cable (RS323) – $11
This cable allows the wireless console server to establish serial connectivity via its micro USB port (using an adapter) to an RS-323 serial port.
Optional
Since the Raspberry Pi Zero W requires a micro SD card, this allows for a machine that does not have an SD Card reader/writer to image the card via its USB port.
USB-to-Serial Cable (RJ-45) – $11
This cable allows the wireless console server to establish serial connectivity via its micro USB (using an adapter) port to an RJ-45 console port.
Again, these are Amazon affiliate links above and any purchases made using these links will result in a commission to me. I appreciate your patronage using these links as it allows me to offset my hosting costs.
Once I had the required components, I was able to proceed with the build out of my wireless console server.
Building the Wireless Console Server
This whole project originated after I had a discussion with one of my mentors. I had a Raspberry Pi Zero W but never did anything with me. He challenged me to find a good use of the hardware before our next monthly talk and I settled on this idea. The first step to make this device usable was to install the latest Raspbian operating system on the device.
Installing the Operating System
The Raspberry Pi computers are great because they have a lot of support from its manufacturer and larger community. The creators of this computer already created software called NOOBS (New Out of the Box Software) to aid in installing the operating system for this device. Here is a link that walks through installing the OS on the Raspberry Pi Zero W.
How to install NOOBS on an SD card
In this case, we will be using a more advanced method of installing the OS using the “Raspbian Buster Lite“. In order to perform the steps in this method, the following software needs to downloaded to your machine:
Downloading the Raspbian OS
Once I have the tools to prepare the SD Card for the Raspberry Pi Zero W, I can proceed with downloading the operating system to install. The Raspbian Buster Lite OS can be downloaded from the following link.

Download the ZIP version of the Raspbian Buster Lite and extract the contents of that file to a temporary folder similar to what is shown in the screenshot below:

Preparing the SD Card
It is a best practice recommendation to freshly format the SD-Card prior to imaging with the Raspbian OS. This will make sure that the card is in the correct format and prepared to have the OS installed without any issues. To do this, complete the steps below:
SD-Formatter
1. Insert the SD-Card into the computer that will be imaging with the Raspbian OS
2. Open the “SD-Card Formatter Application”

3. Change the “Volume label” to “RASPIAN” | Select “Quick format” | Click “Format”

It is super important that you select “Quick format” in this step if you have a SD-Card with a low write/re-write tolerance. Using the “Overwrite format” could have dire consequences in making the card unusable after the format process completes.
4. Click “Yes” to confirm the write process dialog box

5. Observe that formatting was successful | Click “OK” to acknowledge

Imaging the SD Card with the Raspbian OS
Once the SD-Card has been successfully formatted, it can have the Raspian OS written to it. This method will greatly differ from legacy methods of installing operating systems since the Raspberry Pi Zero W is an embedded system and does not have easy access to an external disc peripheral. Instead, this method will write an image of the Raspbian OS to the card directly which will be able to be inserted into the Rapsberry Pi Zero W.
BalenaEtcher
There are many different utilities available to write an image to an SD-Card and they can vary depending on the operating system you are using. Since I am using Windows in this case, I will use the BalenaEtcher as recommended from the Raspbian Pi Foundation.
To complete this process, follow the section below:
1. Open up the BalenaEtcher application | Click “Select Image”

2. Select the “Raspbian-buster-lite.img” | Click “Open”

3. Ensure that your flash card is selected | Click “Flash”

You may get a permissions window to execute this process via the command window. Click “Yes” to allow the imaging process to start.
4. Observe the imaging process occur

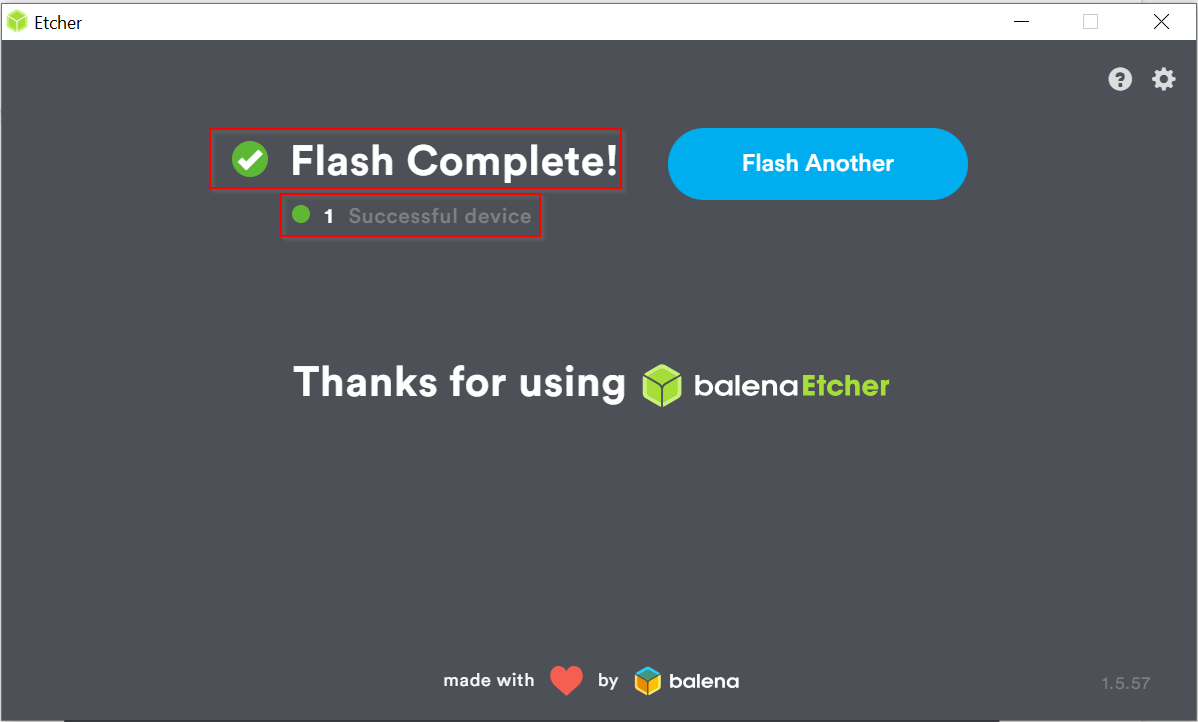
5. Once the imaging has finished, observe the validation step

6. Once the validation has completed, confirm the process completed successfully
At this point, the SD-Card should be ready to be installed in the Raspberry Pi Zero W to boot. At this point, a keyboard and monitor (via HDMI) can be connected to the Pi to continue its configuration.
Configuring Network Access
Once terminal access is available on the Raspberry Pi, I configured the wireless network on the device so it can connect to the Internet. To do this, you can go through the procedure below.
1. Within the terminal, log in with the default credentials
username: pi
password: raspberry

2. Open the raspberry pi configuration tool by running the following command:
sudo raspi-config
3. Select “Network Options” | Press “Enter”

4. Select “Wi-fi” | Press Enter

5. Enter in the SSID of the wireless network to connect to | Press Enter

6. Enter the passphrase for the wireless network | Press Enter

7. Once complete, go back to the original raspi-config page and select “Finish”

8. Once at the prompt, execute the following command to confirm the IP address:
ip addr list wlan0
Setting up SSH Access
Once you have network connectivity, the remainder of the steps can be completed via the network through SSH. However, it is still best to use keyboard and mouse since the IP address will be changed to a static address as part of the configuration steps.
SSH Access – Pre-terminal Access
The Raspberry Pi Zero W will look for specific files to enable specific configurations upon boot. To enable the Pi to configure itself to listen for incoming SSH connections, do the following:
1. Create a blank file called “ssh” (no extensions) and put it into the “/boot” directory of the file system.
Please note, this step needs to be done from whatever computer you used to create the operating system via NOOBS prior to inserting the SD-Card into the Raspberry Pi Zero W.
SSH Access – Post Terminal Access
In the event that you have connectivity to the CLI of the Raspberry Pi via SSH or through regular keyboard and monitor, you can do the following steps below to enabled persistent SSH access:
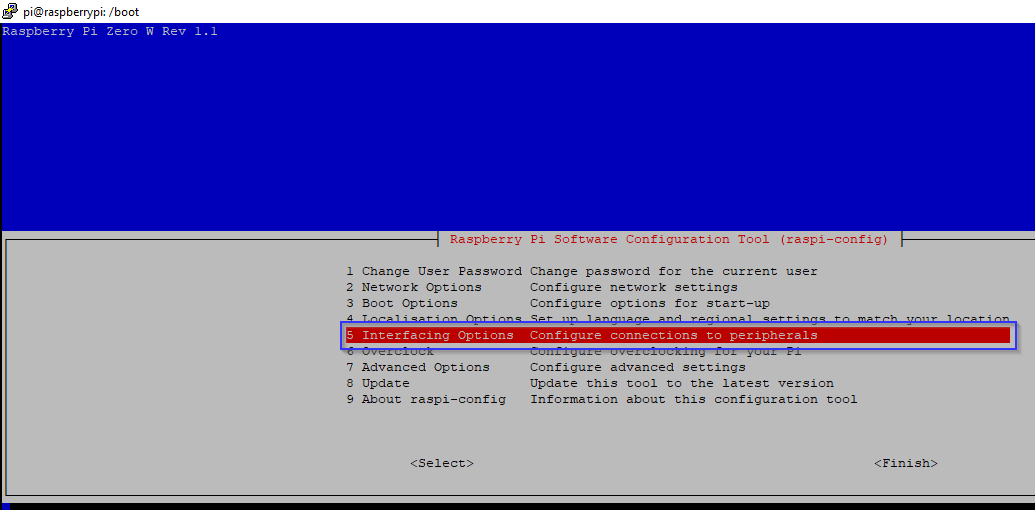
1. Open the raspberry pi configuration tool by executing the following command:
sudo raspi-config
2. Choose “Interfacing Options”
3. Select “SSH”

4. Answer “Yes” to the question

5. Confirm that the “SSH Server is enabled”

Updating the Operating System
Once persistent console access is established with the device, it is a best practice to make sure that all of the components on the Pi are up to date. To do this, follow the procedure below:
1. Ensure that you have the latest package lists available from the Raspbian repositories by executing the command:
sudo apt-get update
2. Once that command finishes, instruct the Pi to perform an upgrade on its applicable files by executing the commands:
sudo apt-get upgrade && sudo apt-get dist-upgrade

While it is not necessary, I reboot my Pi as a best practice to completing a “dist-upgrade” command.
Install Wireless Console Components
Up to this point, there is a clean slate of a Raspberry Pi Zero W. As with any other computer, in order to get use out of the device, I have to install the applications which add functionality. In this section, I will install the software to enable the Pi to function as an access point, DHCP server and serial terminal server.
Install Serial Software
A popular serial communication application in Linux is called “minicom”. While there are other options to handle this type of interface between the Pi and devices serial port, this was chosen because it has a text based GUI that helps with navigating the configuration parameters (such as baud rate). To install this software, execute the following command:
sudo apt-get install minicom

Install Access Point and DHCP Software
To facilitate the connectivity between your access device (laptop, desktop or phone) and the Raspberry Pi, I will be installing software to make the Pi function like an access point. In addition to that, I will have the Pi to serve out IP addresses dynamically so that there is minimal configuration required on the accessing device.
To install the access point software and DHCP server, execute the following command:
sudo apt-get install dnsmasq hostapd

Configure the Access Point
The Raspberry Pi Zero W has a wireless chip that allows it to function as a wireless client or a wireless server (access point). The main intent of this to facilitate the wireless access to the console server. Follow the steps below to enable this functionality:
1. Create the file “hostapd.conf” in the “/etc/hostapd” directory
sudo nano /etc/hostapd/hostapd.conf
2. Set (paste) the following parameters within this file | Press “CTRL+X” | follow prompts to save:
interface=wlan0
driver=nl80211
ssid=ConsoleServer
hw_mode=g
channel=6
wmm_enabled=0
macaddr_acl=0
auth_algs=1
ignore_broadcast_ssid=0
wpa=2
wpa_passphrase=password123!
wpa_key_mgmt=WPA-PSK
wpa_pairwise=TKIP
rsn_pairwise=CCMP
The configuration above creates an SSID called “ConsoleServer” that will be broadcast once the service referencing this configuration has been restarted. It uses a password of “password123!” which can be updated prior to saving.
3. Open the /etc/default/hostapd
sudo nano /etc/default/hostapd
4. Configure hostapd to reference the created file above by updating the “DAEMON_CONF” parameter | Press “CTRL+X” | follow prompts to save:
DAEMON_CONF="/etc/hostapd/hostapd.conf"
5. Update the configuration to allow execution of the hostapd service and configure it to start automatically upon boot:
sudo systemctl unmask hostapd
sudo systemctl enable hostapd
Configure the DHCP Server
Running a DHCP server on the Raspberry Pi allows for minimal configuration on the accessing the device since the Pi will automatically assign an IP address that is valid to access the unit. The only IP address the user will need to know is that of the Raspberry Pi. To configure the DHCP server functionality, complete the following steps:
1. Rename the existing DHCP configuration file (/etc/dnsmasq.conf)
sudo mv /etc/dnsmasq.conf /etc/dnsmasq.conf.old
2. Create a new DHCP configuration file
sudo nano /etc/dnsmasq.conf
3. Add (paste) the following DHCP server configuration into this file | Press “CTRL+X” | follow prompts to save:
interface=wlan0      # Use the require wireless interface - usually wlan0
dhcp-range=192.168.10.10,192.168.10.50,255.255.255.0,8h
This configuration assigns an IP address from the “192.168.10.0/24” network for a lease time of 8 hours on the wireless interface. The first connecting access device should be assigned an IP address of “192.168.10.10”.
4. Force a reload of DHCP server configuration
sudo systemctl reload dnsmasq
Set a Static IP address
In order to have a consistent access experience, I need to assign a static IP address to the Raspberry Pi. Once this has been assigned, all I have to remember is this IP address once I connect to the Raspberry Pi. To set up a static IP address on the Pi, complete the following steps:
1. Make a backup of the existing “/etc/dhcpcd.conf” file
sudo cp /etc/dhcpcd.conf /etc/dhcpcd.conf.old
2. Open up the “/etc/dhcpcd.conf” file in a text editor
sudo nano /etc/dhcpcd.conf
3. Add the following section to the end of the file | Press “CTRL+X” | follow prompts to save:
interface wlan0
    static ip_address=192.168.10.254/24
    nohook wpa_supplicant
Enabling the Access Point
Now that all of the networking has been set up, the last step to test the configuration is to enable the access point functionality. The easiest way to enable this is to reboot the Raspberry Pi via the following command:
sudo rebootPlease note, when the raspberry pi reboots, it will no longer be on the wifi you configured earlier and instead, will be broadcasting the “ConsoleServer” SSID. You can connect to the Raspberry Pi Zero W via that SSID and use its default IP address of 192.168.10.254 to connect via SSH.
Testing the Wireless Console Server
Assuming all of the steps above were created successfully, the Raspberry Pi should be configured and ready to be tested accessing a device via the console.
Connecting to the Wireless Console Server
The benefit of using this device is allowing access to a device’s console via without necessarily being directly connected to the device. Since the Raspberry Pi Zero W has been configured to function like an AP, I can connect to its advertised wireless network called “ConsoleServer” as shown below:

Since this is an ad-hoc wireless network, network connectivity will likely not be available as it is not bridging to a network that is connected to the Internet. I noticed that my computer has been assigned an IP address from the Raspberry Pi Zero W DHCP network (192.168.10.0/24):

Once connected to its broadcast address, I can SSH into the wireless console server on its default IP address of 192.168.10.254 and use the default username and password (pi/raspberry) to log in:


Alternatively, I can use an SSH client on my phone (such as JuiceSSH on Android) to log into the Wireless Console Server as well.

Connecting via Console to Device
Once I have confirmed connectivity to my Raspberry Pi Zero W via SSH, I can proceed with connecting to a device via console. I begin this process by connecting my USB-to-serial cable to the device.
I confirmed that the cable is recognized by the Raspberry Pi Zero W by tailing the messages log and seeing that the device is detected as shown in the screenshot below:

Referencing the screenshot above, I saw that the USB-to-serial cable was assigned the “ttyUSB0” designation. Knowing this designation, I am able to launch the minicom application and connect to my FortiGate’s console port.
sudo minicom -D /dev/ttyUSB0
This launches the “minicom” application.

Press CTRL-A +Z to access the commands for minicom

Press “O” for “cOnfigure Minicom” | Select “Serial port setup”

Press “E” and update the settings to reflect that which is required of the console device

Press the corresponding letters to configure the settings to match that of the serial console of the device being connected to.

Hit “Esc” and “Save as dfl”

Select “Exit” then hit “Enter” a few times to trigger the prompt from the device that is connected via console.

I have successfully connected to the FortiGate 80D via its console. Now I can perform a reboot, perform an upgrade or even troubleshoot it via my wireless console server if it ever becomes unavailable on the network.
I hope this adds a very useful tool in your arsenal and reduces the amount of stress associated when you need to connect to a device via its console. Please let me know your comments on this article below.
Cool!!
I saw you can ssh to Raspberry and then connect to COMx
Is that possible like this
sship:2001 > COM1
sship:2002 > COM2
Raspberry connect using usbconsole mini-b (not console) to many Cisco
Have you ever try that?
tq
Hi Nawir,
Thank you for checking out my post. There’s actually a different application you can use for this exact use case. It is called ser2net and it is available at the following link:
https://sourceforge.net/projects/ser2net/
The original intent of this project is not to be a standalone console server and instead, be more of an ad-hoc device that you use while you are troubleshooting in the field. However, it could easily be adapted for that use case using the program referenced above.
I hope this helps!
‘mosh’ is a nice addition to this setup
Thanks for your feedback. I never heard of this project but I just looked it up and see how this could be tremendously useful for this application. For those who may want to look into this, the website is:
https://mosh.org/